Configuring the output
7-segment display modules are typically mapped to simulator variables that output numerical values. The following steps demonstrate how to use a display module to show the COM1 active frequency with a MAX7219 display module in Microsoft Flight Simulator 2020 and Microsoft Flight Simulator 2024.
Tip
The steps for using a 7-segment display module in an X-Plane project are similar. Use the X-Plane DataRef type when configuring the Sim Variable tab.
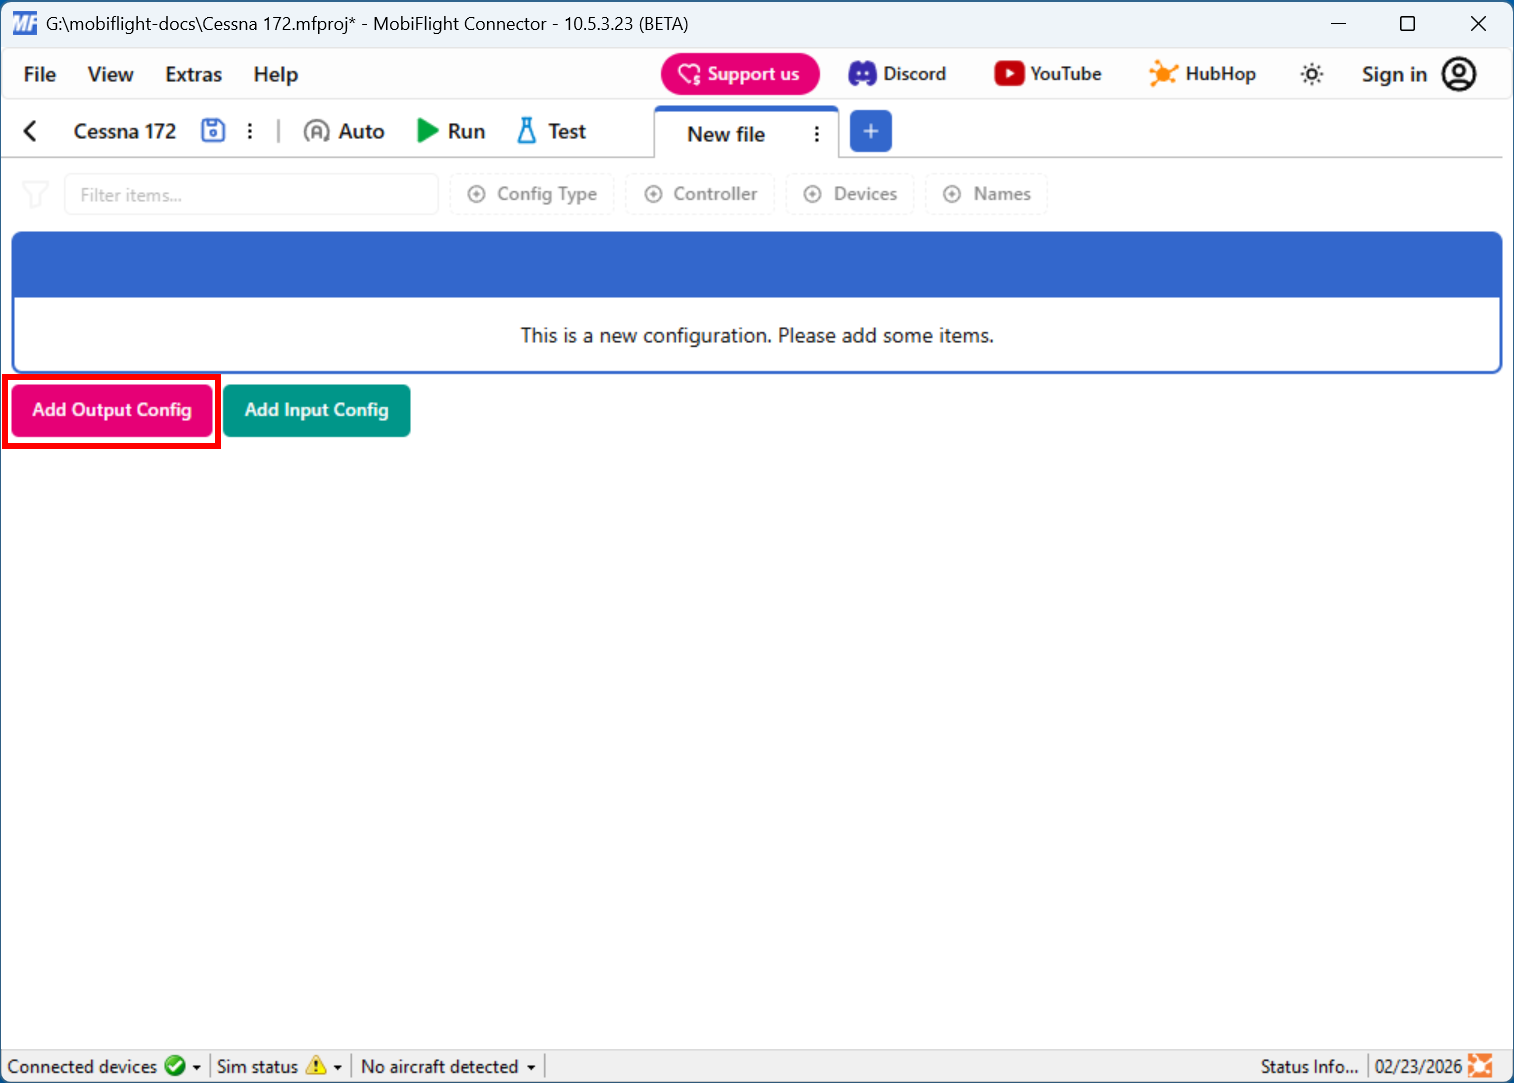
Add a new output config
Click the Add Output Config button in the main MobiFlight window to open the output configuration dialog.
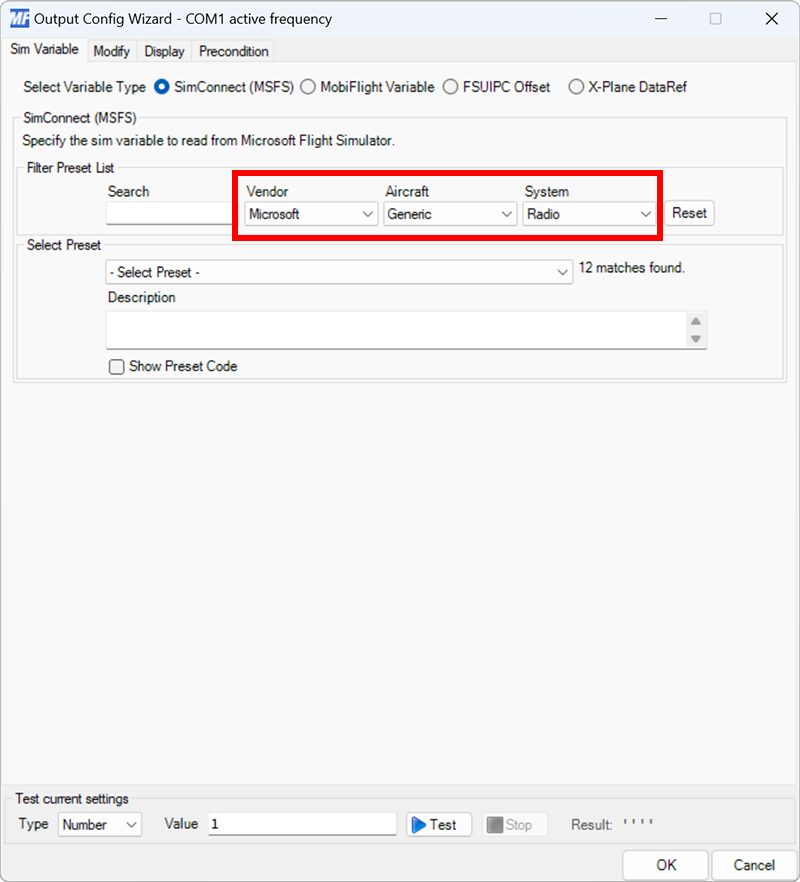
Filter the output presets
On the Sim Variable tab, use the Filter Preset List dropdowns to filter by Microsoft, Generic, and Radio.
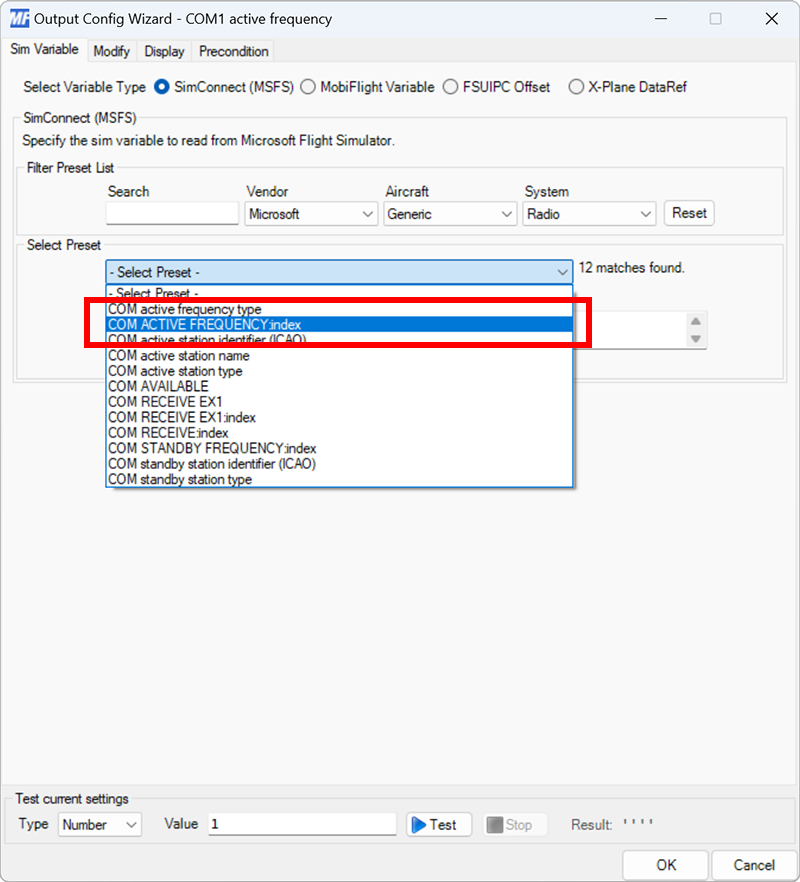
Select the COM 1 active frequency preset
Use the Select Preset dropdown to select the COM ACTIVE FREQUENCY:index preset.
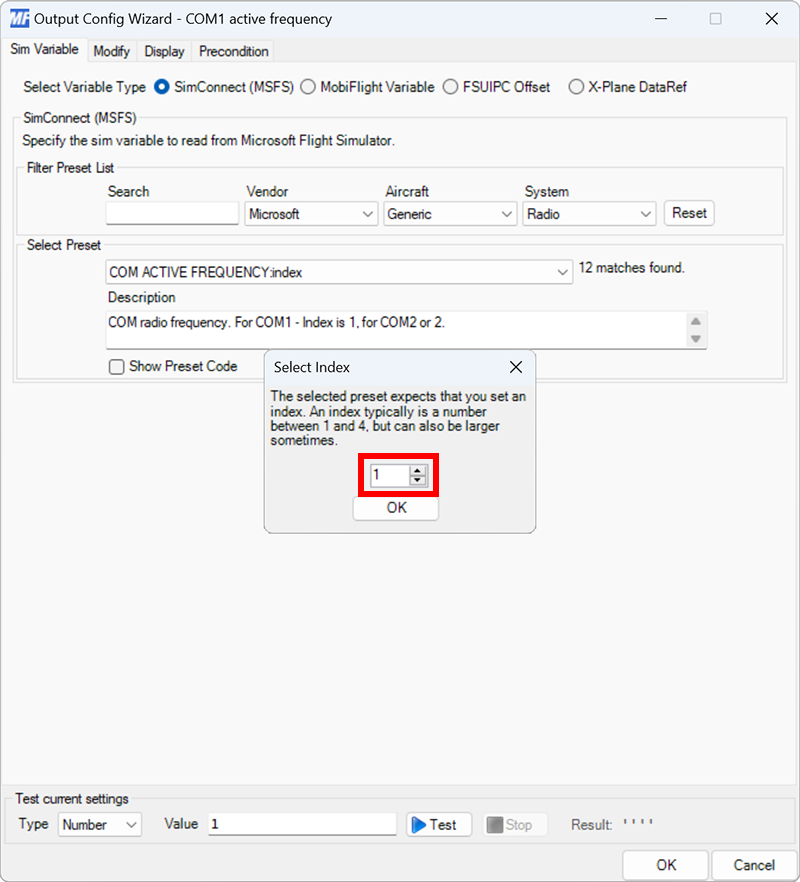
Set the radio index
Since aircraft have more than one radio, MobiFlight will show a dialog to specify the COM radio value to display. Use the dialog to specify index 1.
Select the board and device type for the output
On the Display tab, use the Module and Use type of dropdowns to select your connected board and the Display Module device type.
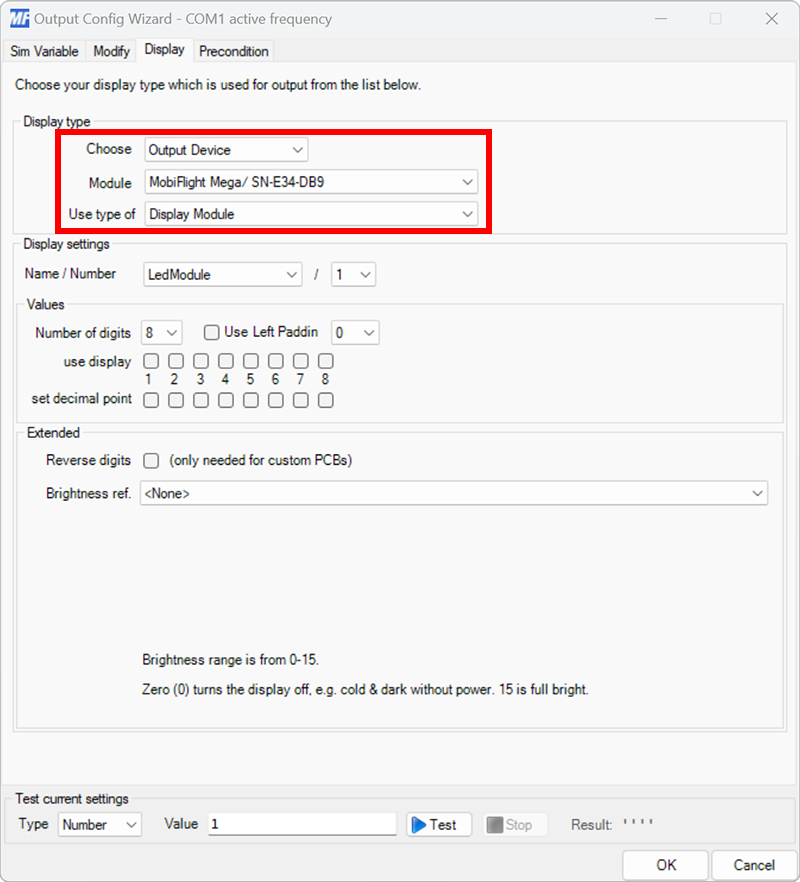
Select the module to use for display
Use the Name / Number dropdown to select the module that should display the output value. If more than one module is connected in series, use the number dropdown to specify which module in series will display the value.

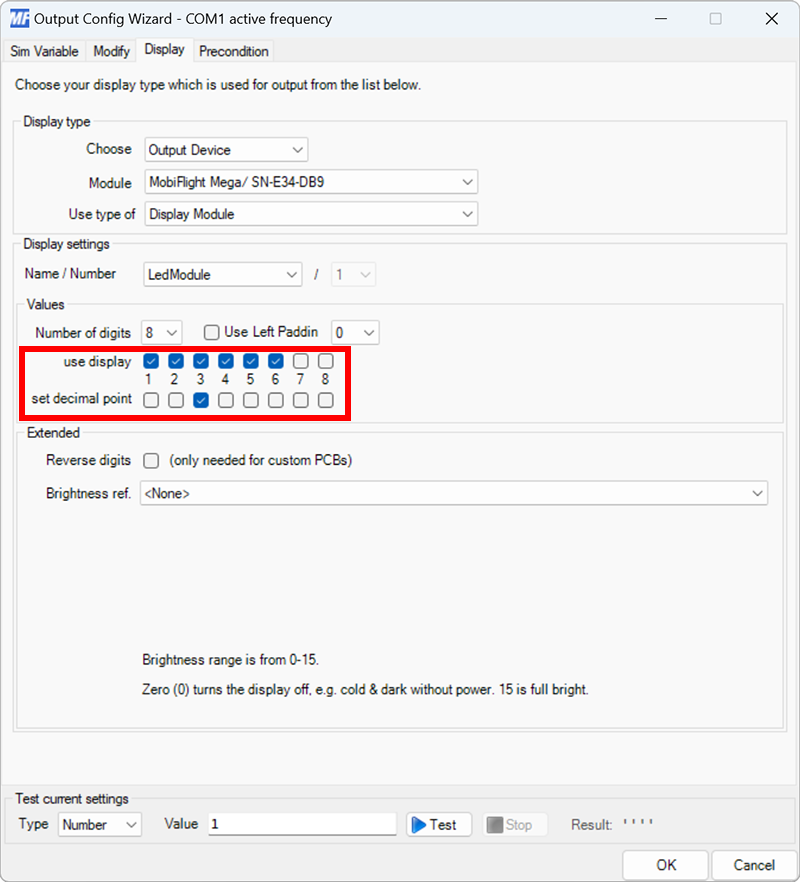
Specify the digits and decimal point for display
Use the use display checkboxes to specify the six digits to use for the frequency display. Use the set decimal point checkbox to specify where the decimal point should display.
Tip
Leave the number of digits dropdown set to 8 even though only six digits are used to display the frequency. This dropdown is only changed in advanced display configurations.
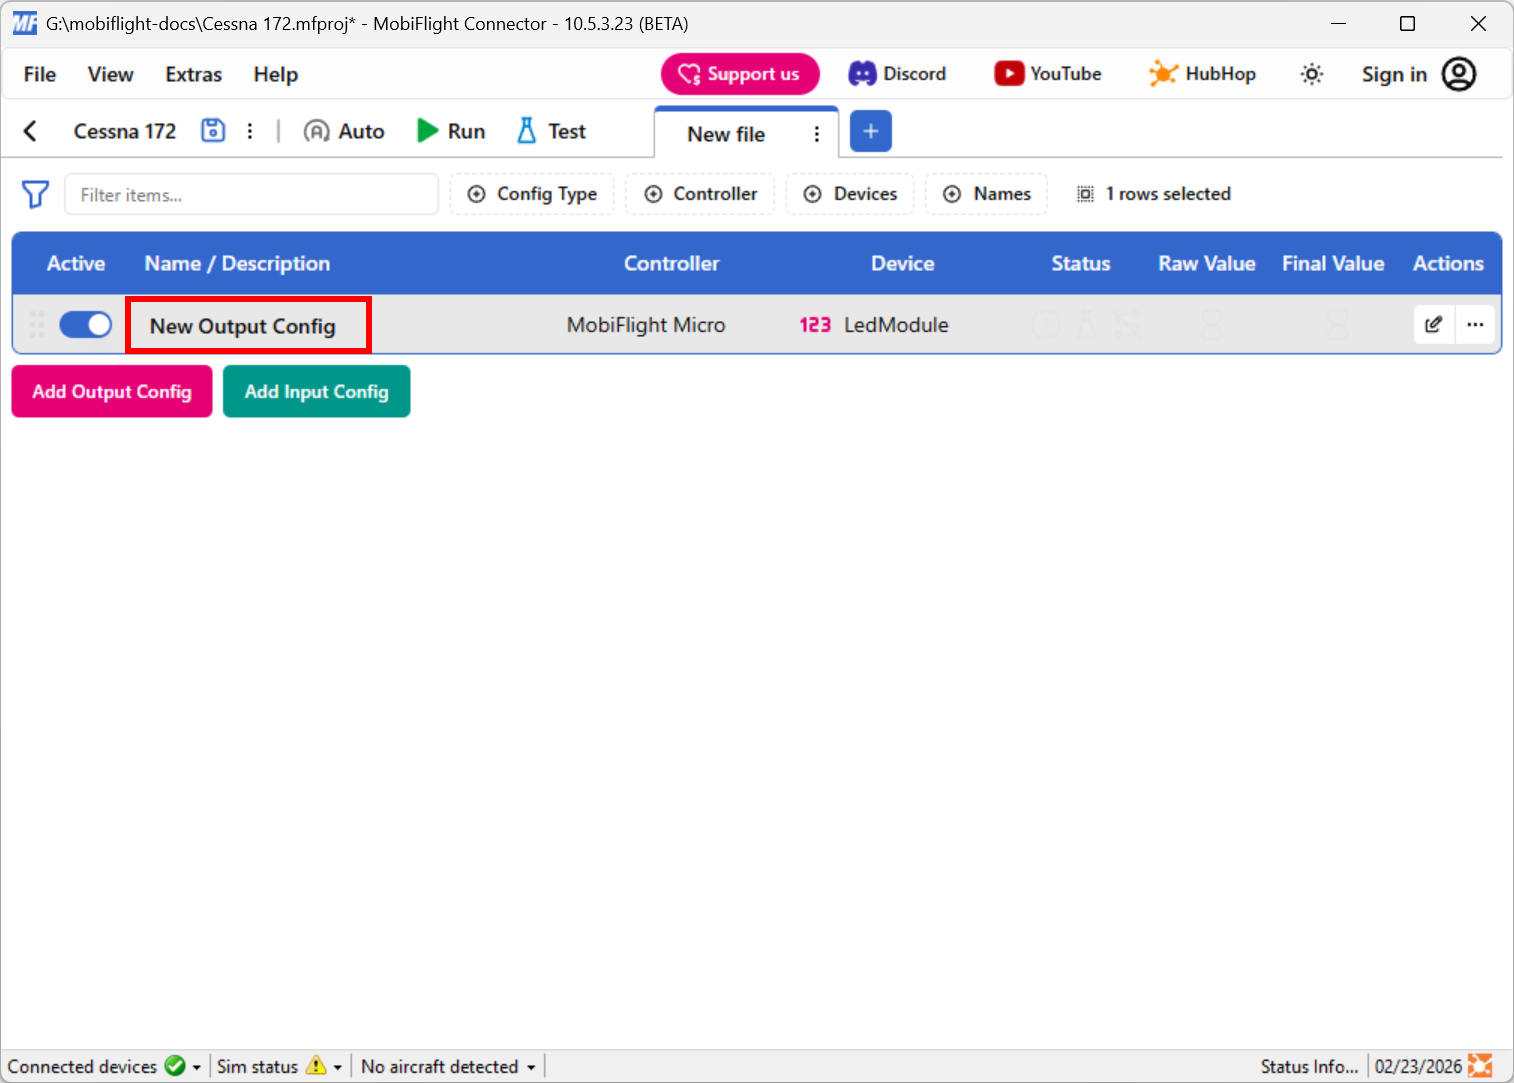
Close the dialog and name the config
Click the OK button to close the dialog, then double-click on the New Output Config name in the main window.
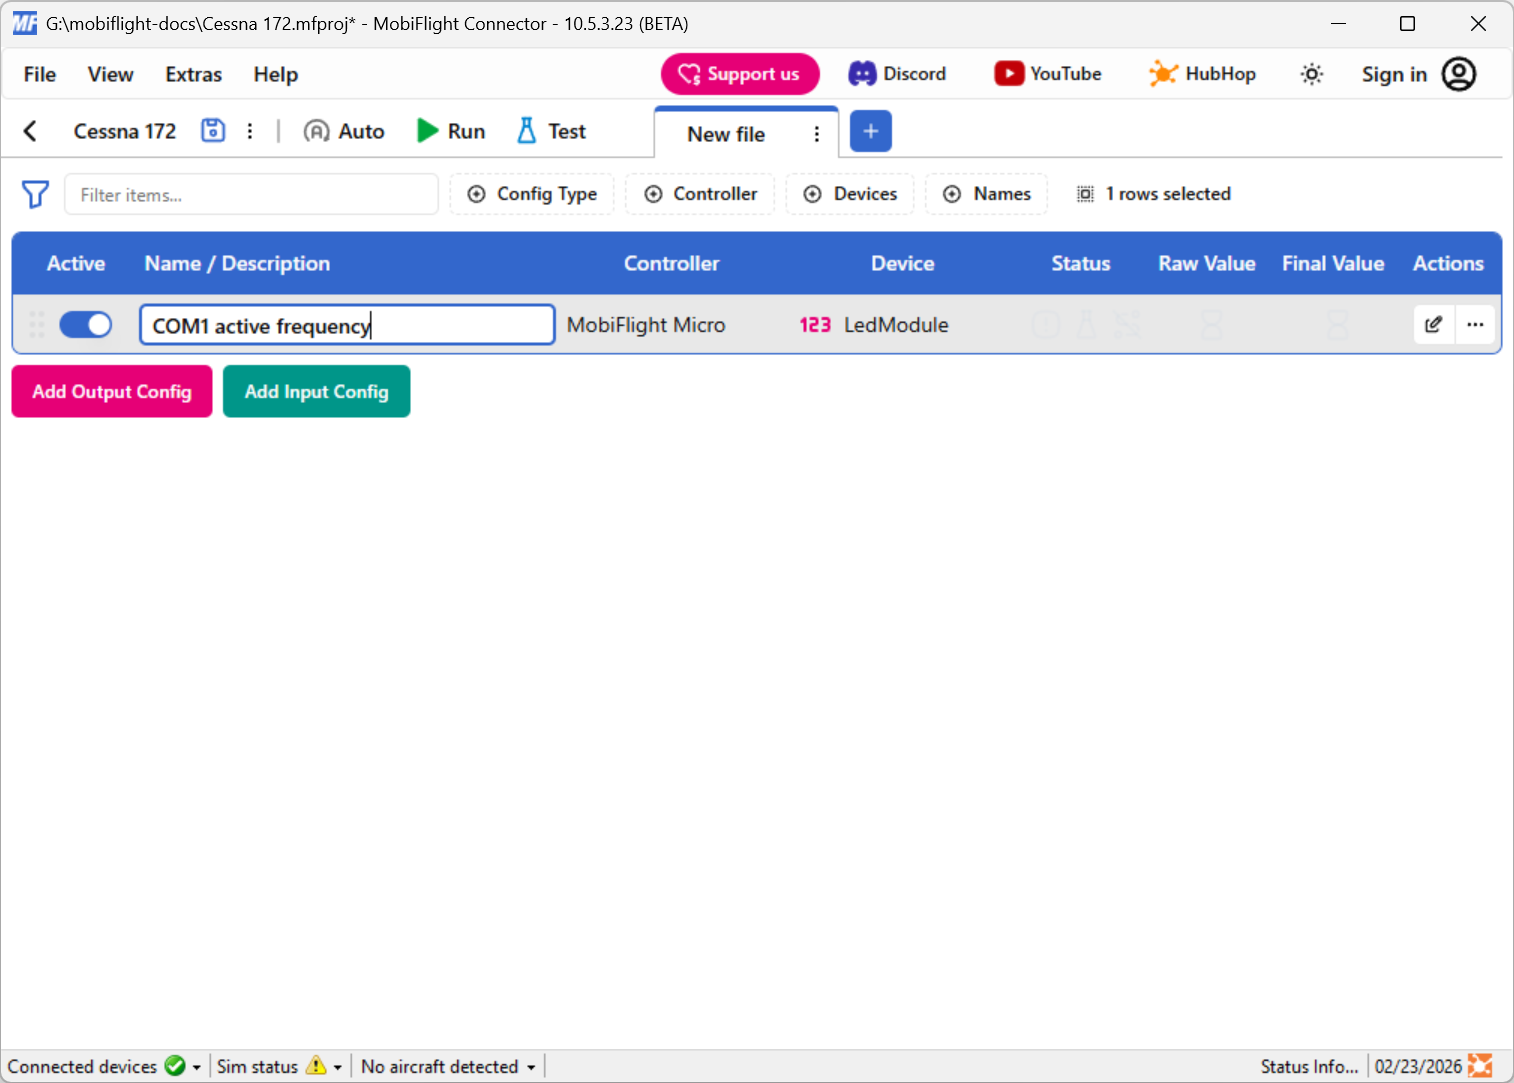
Type in a meaningful name for the new config, for example COM1 active frequency, and press enter to apply the change.
Try out the event
Spawn an airplane in Microsoft Flight Simulator. Make sure the MobiFlight Run button is clicked in the toolbar, then verify the display shows the COM1 active frequency.
Tip
TM1637 display modules are configured the same way but have fewer digit and decimal pins to select from in the Display tab.